
My friend Laurie, whose beautiful new cottage style home I showed you in October, asked me to make a new fabric shower curtain for her daughter’s bedroom. She gave me the original one to use as a pattern and also gave me the fabric she had picked up to re-do Claire’s room. Laurie is the one who gave me the huge, gorgeous IKEA desk which now graces my sewing room, so I was glad to get a chance to return the favor by making the curtain. I would have done it any way, but still…I was feeling ‘in debt’.
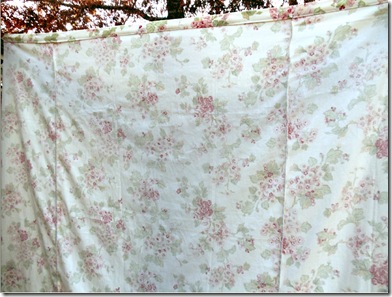
Since fabric shower curtains are pretty standard, I think that the measurements that I used should work for just about anyone’s shower. The real challenge here was how to make the three fabric panels look ‘balanced’. Her fabric was about 59” wide, but the shower curtain needed to be 72” wide total. The length was 70”. You can make it any width or length you like, but this was the same size as the store bought one hanging in my own bathroom.
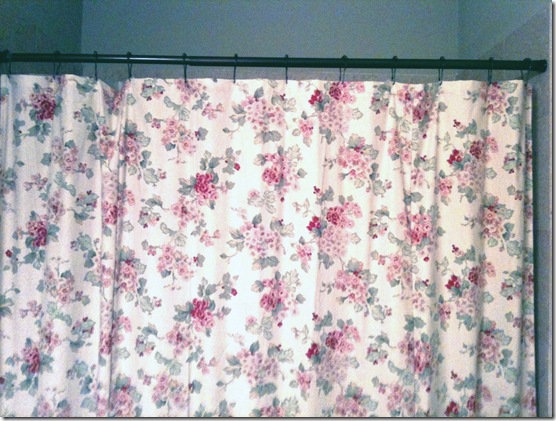
I didn’t want to sew the curtain with a seam right down the middle, so I decided to make it in three panels. If I used all of the width of the fabric for the middle panel (59”), I would then end up with two skinny 10” strips on the side to equal the full width. I thought that would look a little odd. So I decided to make the center panel 50% of the total width and the left and right panels 25% each. The result was very nice. It wasn’t the most frugal option, but I knew that saving every penny wasn’t the priority here for Laurie. We wanted a shower curtain that looked good.

Supplies Needed:
Cutting Fabric Pieces – Remember the golden rule of sewing large pieces of fabric. “Measure once, cut twice. Measure twice, cut once!” The moral of this quote is take your time with the measuring. I feel like this is the most critical step. Once the fabric is cut out properly, you can breathe easy.
Center Panel
Measure and cut one large rectangle of fabric that is 44-45” wide (the complete width of a normal bolt but not of the upholstery fabric (normally 59-60”) that is also 2 yds and 3” long. (adjust if you want the curtain longer or shorter).
Side Panels
Cut remaining fabric to 2yds and 3” long. Then measure and mark from one selvage edge into the middle of the second piece of fabric two strips that are 18” (1/2 yard) wide and cut. These are your side panels. I lay out my fabric on the dining room table, and lay a ruler or measuring tape on the left side of the fabric and mark with a pin or marking pen 18” in to the center starting at one end of the long rectangle. Then I keep moving down about 10” or so until I’ve put in pins all the way from the top cut edge to the bottom cut edge 18” from the left selvage. Now you can cut a straight line that is exactly 18” from the selvage all the way from the top to the bottom. It helps to fold the fabric over in half (selvages together) , so you don’t have such a long length to work with. Each side panel will be 18” wide and 6’ 3” long.
Steps for Sewing the Shower Curtain
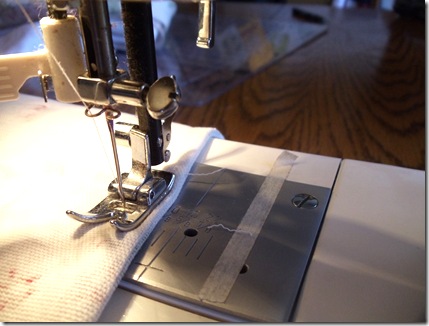
1. Sew the left and right panels to the center one with right sides together. If you are doing a ‘French seam’ sew the panels wrong sides together. See below. Use a 1/2 “ seam, as I allowed for that seam allowance in my measurements.
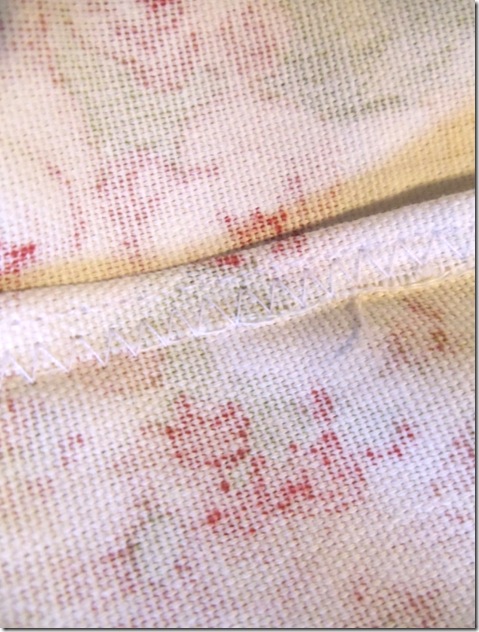
A normal seam allowance with the seam allowance folded over in half ( so that it’s a 1/4” wide after finishing the edge)
and zig-zagged in place to finish the raw edge.
2. Edge Finish the seam allowance.
You can either serge the seam or fold it over and zig-zag it in place, or if you are very brave, you can make a French seam. I LOVE French seams, but the first time, when I was planning to do it, I forgot to put the fabric ‘wrong’ sides together, which is the first step for a French seam. I put it right sides together, and had to finish it the normal way.
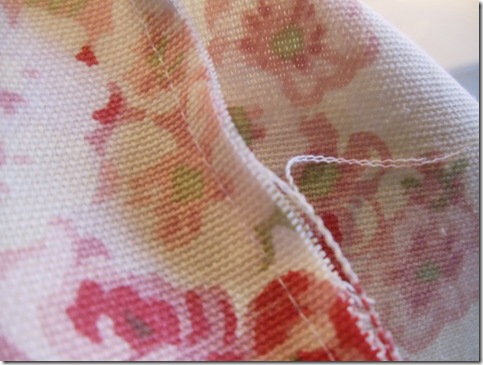
In a French seam, you do the opposite of normal. First, you put the wrong sides together, sew the scant 1/4” seam.

Seam allowance enclosed while sewing right sides of fabric together.
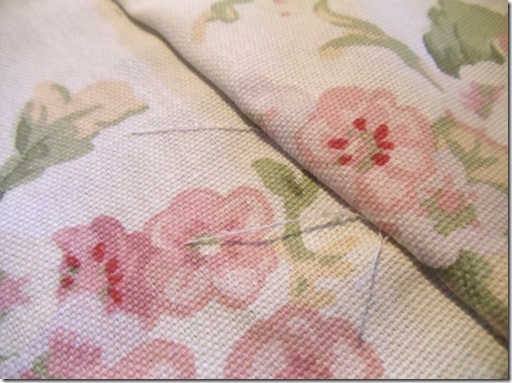
Thread showing because I didn’t take quite a wide enough second seam.
Then carefully fold the fabric so that the right sides are together, with the seam allowance now enclosed in the fabric. Then you stitch again, a little wider than a 1/4”. You want to be sure not to make that second seam too narrow or you will have threads showing or raveling.
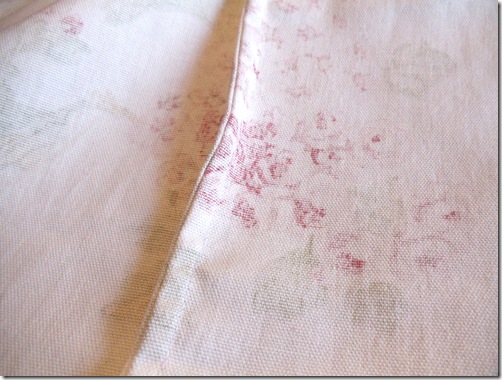
Why use a French seam? Well, the fabric I was using unravels or shreds very easily. It’s a loose weave which is common for linens and heavy cotton fabric. Any time you have a fabric like that, a French seam is a life saver! It’s used most often with delicate fabrics like gauze or chenille. But linen, denim, and sometimes heavy cotton tapestry fabrics do the same thing.
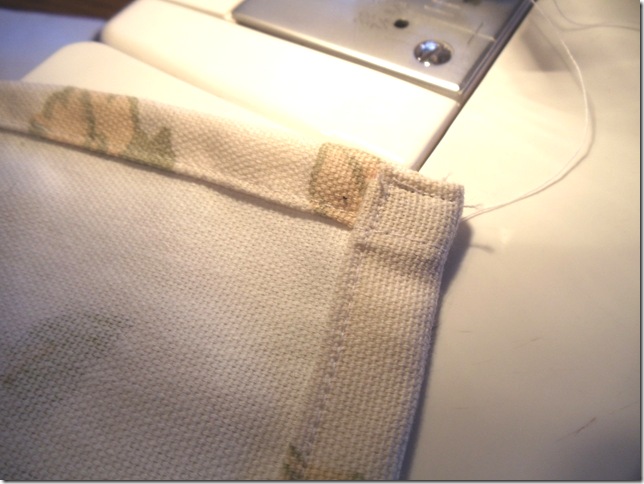
3. Hem the side seams by folding over a 1” seam allowance and ironing a crease into it. Then fold the seam allowance into the crease so that the whole seam is only a half inch wide and the raw edges are encased in the hem. Now top stitch the crease to the fabric. No raw edges are exposed with this method.
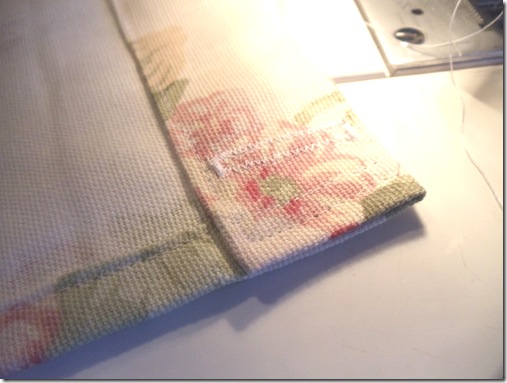
4. Fold the top edge over 2” and iron a crease. Then fold the raw edge under a 1/2 an inch and then top stitch down. This gives you a 1 1/2” inch wide top border.
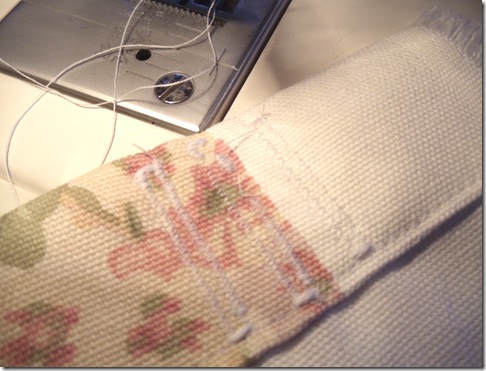
5. Now mark and sew your button holes where the twelve hooks should go. It would be the same place as where your original shower curtain or plastic liner has holes. Or you could use a grommet tool. I always make a ‘practice piece’ and sew a bunch of button holes first to get in the ‘swing’ of things. That way, my final button holes turn out nice on the finished product.
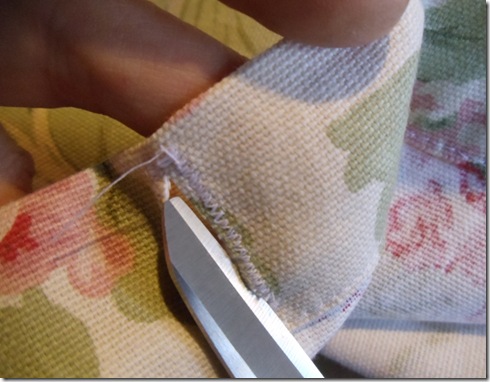
6. Cut open the middle of the button holes. Start with scissors, then finish with your seam ripper if you like.
7. Hem the bottom of the shower curtain the same way you did the sides I allowed 1 inch on each side and the bottom so that you could make a 1/2” wide hem with an extra half an inch folded and tucked inside the hem. Top stitch the hem in place.
Be sure to email me if you have any questions. I’m always happy to help!
Be sure to visit for some great DIY ideas!
If you like these curtains, you might also like these posts from 2010...
How to Use Quilt Blocks to Make a Quilted Tote Bag
How to Make Fleece Sleeping Bags
How to Sew New Covers for Couch Cushions
How to Make A Hooded Bath Towel for a Toddler or Baby
If you like these curtains, you might also like these posts from 2010...
How to Use Quilt Blocks to Make a Quilted Tote Bag
How to Make Fleece Sleeping Bags
How to Sew New Covers for Couch Cushions
How to Make A Hooded Bath Towel for a Toddler or Baby


14 comments
Lovely shower curtain!!! You did a great job. Do you know where the fabric was purchased? I have a lampshade with that fabric and would like to get my hands on some more, but I've never seen the fabric for sale.
Cindy
Actually, Cindy, I don't, but I will ask her. They've been working on the house for a year so I don't know when,in that process, that she purchased the fabric. I'll check with her.
how pretty, Donna.
yes, that is super pretty and perfect for the intended bathroom.
I can't seem to find out how to copy your button to put on my blog.
Just found you and read some of your blogs, they will be most helpful and inspirational.
Nana, just right click the photo and save it to the desk top. Then you can add it as a picture to your sidebar and link it back here. Wow--I'm so pleased you want my button!
That makes my day. :o)
xo
Donna
That fabric just took my breath away! You did an awesome job with the curtain and the tutorial. Thanks.
A handmade shower curtain will look so much better than a store bought one!
It is a beautiful shower curtain and you did a lovely job on it. I love the print in the fabric.
That's a gorgeous shower curtain, Donna. Great tutorial, too.
Thank you for linking up to Masterpiece Monday. Your cloth shower curtain looks great! Mary :O)
I have to say you have inspired me to do something with the shower curtain. I have not been doing anything much because I do not own the home.
I have made a curtain before. I know in a mobile that a twin size sheet works. I wanted to add a little flare to it, so I purchased some material as accent. Not too much as the room is very small and dark (no window. My next step will be to paint the bathroom white and also get some new towels at Wal-mart on sale and add some of the same flare material as trim on the towels.
It is amazing how up lifting it is to just add some little detail that makes a home feel like home!
Nana, I had no idea a twin size sheet was the right size for a mobile home bathroom. How funny! I've never measure. I just bought the normal size one and used it. It is wider than I exactly need. Glad for the tip!
Hope you enjoy it. I'm re-doing my bathroom too --someday-- It's part way done. I'll be doing a big post on how to re-do the walls so they don't look like a mobile home.
Most people think my house doesn't look anything like a mobile home. I think it's because we've lived in regular houses forever. We never relied on all the busy trims and stuff for decor. In fact, we pulled off all the borders. We hated them! No busy wall paper too. We are painting over all of it.
I'm glad you like the shower curtain. :o)
Donna
I joined The Clip Cafe...and look who I found, great job, and so pretty.
Thanks for linking up!! I love that fabric :-)
Post a Comment